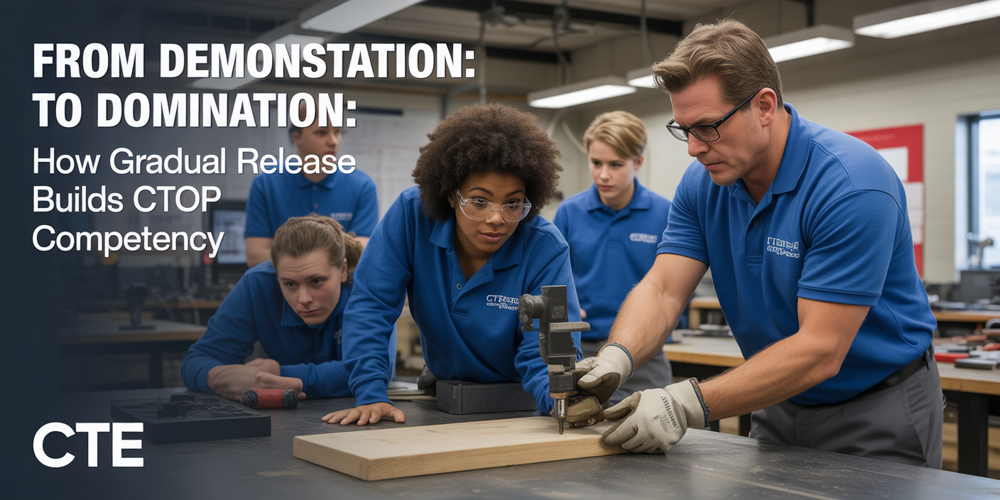
Gradual Release of Responsibility — the “I Do, We Do, You Do” framework — isn’t just a general-education teaching strategy. In a CTE welding bay, automotive shop, or carpentry lab, it’s the difference between students watching a demo and students actually doing the work with confidence. Here’s how to deploy it this week.
Why Most CTE Demos Don’t Stick
Every CTE instructor has been there: you run a clean demonstration — maybe a fillet weld in the 2F position, or a brake rotor measurement, or a residential circuit rough-in. Students nod. You step back. And then the questions come, one after another, because most of them didn’t absorb what they just watched.
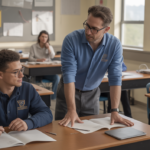
The problem isn’t the demo. The problem is the gap between watching and doing. In academic classrooms, that gap is bridged with worksheets and discussion. In a CTE lab, the bridge has to be physical — students need their hands on the material while the instructor is still actively guiding them. That’s exactly what Gradual Release of Responsibility (GRR) provides, and it maps onto shop-floor instruction better than almost any other pedagogical framework.
Research from Grand Canyon University’s education faculty outlines the three-phase model clearly: the teacher models the skill (“I Do”), the teacher and students execute together (“We Do”), and the student performs independently (“You Do”). What makes this powerful for CTE isn’t the theory — it’s how naturally the three phases align with how trades are actually taught on job sites. Journeyworkers don’t hand apprentices a manual. They show, they guide, and then they step back. GRR just formalizes what skilled trades have always done instinctively. (GCU)
The Technique, Step by Step
Phase 1: “I Do” — The Expert Model
This is the demonstration, but it should be more than performance. The instructor narrates decision-making in real time. In a welding context: “I’m setting my amps to 120 because this is 1/4-inch mild steel in the flat position. I’m going to strike the arc about a quarter-inch ahead of where I want the puddle to start, then pause briefly to let the toe wet in before I start my travel speed.”
The key is thinking aloud. Students aren’t just watching your hands — they’re learning your reasoning. The Evidence-Based Teaching project emphasizes that effective modeling makes invisible cognitive processes visible to learners. In a shop setting, that means narrating not just what you’re doing, but why — why you chose that feed rate, why you’re backfeeding the wire, why you’re checking the ground before you start. (Evidence-Based Teaching)
Keep it tight: 5 to 8 minutes maximum. Any longer and you’re performing, not teaching.
Phase 2: “We Do” — Guided Practice
This is where CTE labs diverge from lecture halls. In a mixed-skill environment, the “We Do” phase can be structured in tiers:
- Advanced students assist by holding material, calling out observations, or performing setup tasks while the instructor works through the skill with a beginner
- Mid-level students execute the skill on their own workpiece with the instructor circulating and providing real-time corrective feedback
- Beginning students work alongside the instructor on a shared piece, performing individual steps with direct supervision
This tiered approach — endorsed by ACTE’s CTE Learn lab instruction coursework — means every student is engaged, not just the one at the bench. The instructor circulates rather than anchoring to a single station. Advanced students build leadership and communication skills. Beginners get the scaffolding they need without slowing the whole class. (CTE Learn)
Phase 3: “You Do” — Independent Competency
Students execute the skill on their own workpiece with no instructor intervention beyond safety monitoring. The output is graded — not on effort, but on whether it meets the stated standard. A fillet weld either has proper toe blend and adequate throat, or it doesn’t. A brake measurement either falls within spec, or it doesn’t.
This phase produces the performance data that CTE programs need for Perkins V reporting. Each “You Do” attempt is an observable skill demonstration — the kind of evidence that Comprehensive Local Needs Assessments (CLNAs) require to document student skill gains. The three-phase structure doesn’t just build competency; it naturally generates the documentation pipeline that federal accountability demands.
Why It Works in Trade Settings
The Gradual Release model succeeds in CTE for three reasons that general-education research often overlooks:
First, physical skills require physical repetition with decreasing scaffolding. You can’t learn to weld from a YouTube video. You can’t learn to wire a circuit from a diagram. The “We Do” phase provides the critical middle ground where students make mistakes while expert help is still immediately available — reducing material waste and safety incidents.
Second, mixed-skill CTE classrooms are the norm, not the exception. ICEV’s analysis of differentiated instruction in CTE notes that most shop classes contain students at wildly different skill levels. The tiered “We Do” phase turns that liability into an asset by using advanced students as peer mentors while freeing the instructor to focus attention where it’s needed most. (ICEV)
Third, the model produces assessable artifacts at every phase. The “I Do” phase generates an exemplar. The “We Do” phase produces guided-practice work. The “You Do” phase produces independent competency evidence. That’s a complete skill progression documentation chain — exactly what CLNA and Perkins V reporting require, generated as a natural byproduct of good instruction rather than as separate paperwork.
How to Start This Week
- Pick one skill you’re teaching this week — ideally something hands-on that takes 10–20 minutes to execute
- Script the “I Do” narration — write down 3–5 decision points you’ll think aloud during the demo (material selection, tool setting, sequence choice)
- Plan the “We Do” tiering — identify which students will assist, which will practice with circulation support, and which will work independently
- Set the “You Do” standard — define the pass criteria before class starts, and communicate it to students so the target is visible from the beginning
- Log the outputs — photograph or document each phase’s student work for your CLNA evidence file
You don’t need a curriculum rewrite. You need one structured period where the demo includes thinking aloud, the practice includes tiered support, and the assessment includes a clear standard. Start with one lesson. The structure scales from there.
The good, the bad, what’s best?
The good: GRR is intuitive for trade instructors because it mirrors how skills are actually transferred in the workplace. It costs nothing to implement. It generates Perkins V documentation as a natural byproduct. And it gives every student in a mixed-level shop something productive to do during practice time.
The bad: The “We Do” phase demands real instructional skill — circulating effectively, managing multiple student stations, and delegating to advanced students without turning them into unpaid TAs. Instructors who are used to running demos and then stepping back will find the “We Do” phase uncomfortable at first. It also requires planning: you can’t wing tiered practice on the fly.
What’s best: The approach works. The evidence base is strong across both general and career-technical education. For CTE programs under pressure to document skill gains for Perkins V while serving mixed-ability classrooms, Gradual Release isn’t a trendy add-on — it’s the most practical framework available. Start with one skill, one period, one structured attempt. Build from there.
✅ Implement Gradual Release This Week
If you’re running demos and then stepping back, you’re skipping the most important phase. Structure your next hands-on lesson with explicit “I Do → We Do → You Do” phases. Plan the narration, plan the tiering, and set the standard before class. Your students’ work will improve — and your CLNA documentation will practically write itself.
Sources:
- How to Use “I Do – We Do – You Do” in Teaching | GCU
- The I Do WE DO YOU DO Model Explained | Evidence-Based Teaching
- ED206 – Teaching in the Lab and Shop Environment | CTE Learn
- 9 Best Differentiated Instruction Strategies for CTE | ICEV
- Transformative Active Learning Strategies for CTE Success | Learning Source
Source: https://www.gcu.edu/blog/engineering-technology/how-use-i-do-we-do-you-do-teaching